Properly cleansing your face in the morning and evening is vital for maintaining healthy and glowing skin. It not only removes impurities, dirt, and excess oil but also prepares your skin for the application of skincare products. Follow this comprehensive guide to ensure that your face cleansing routine is effective and beneficial.
Cleansing your face is essential to remove impurities such as dirt, pollutants, and dead skin cells that accumulate on the surface throughout the day. These impurities can clog your pores and lead to breakouts, dullness, and other skin concerns. Cleansing helps to balance the skin’s pH levels and promotes better absorption of skincare products, allowing them to work more effectively.
To properly cleanse your face, follow these essential steps:
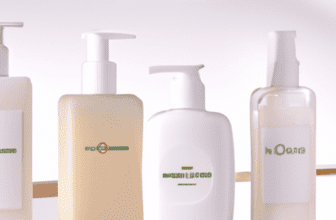
Select a facial cleanser that suits your skin type and addresses your specific skin concerns. Whether you have dry, oily, or sensitive skin, choosing the appropriate cleanser is crucial for maintaining the skin’s natural balance.
Before starting your cleansing routine, ensure that your hands are clean. This reduces the risk of transferring bacteria or irritants onto your face.
Splash your face with lukewarm water to dampen the skin and prepare it for cleansing.
Apply a small amount of your chosen facial cleanser onto your palm. Gently massage it onto your face using circular motions, focusing on areas that are prone to buildup, such as the T-zone.
Using your fingertips, massage the cleanser into your skin for about 1-2 minutes. This helps to remove dirt and stimulate blood circulation for a healthier complexion.
Splash your face with water to remove the cleanser completely. Ensure that no residue is left behind, as it can irritate the skin or clog pores.
After rinsing, gently pat your face dry with a soft towel. Avoid rubbing or pulling on the skin, as it can cause irritation.
In the following sections, we will provide specific instructions for cleansing your face in the morning and evening, along with some tips to enhance your facial cleansing routine. With this information, you can establish a comprehensive skincare regime that promotes a clearer, healthier, and more radiant complexion.
Key takeaway:
- The Importance of Cleansing Your Face: Properly cleansing your face is essential for maintaining healthy skin and preventing various skin issues.
- The Basics of Daily Facial Cleansing: Follow a step-by-step routine including choosing the right cleanser, washing your hands, wetting your face, applying the cleanser, gently massaging your face, rinsing thoroughly, and patting your face dry.
- How to Properly Cleanse Your Face in the Morning: Choose a gentle cleanser, splash your face with water, apply the cleanser, massage in circular motions, rinse, and pat dry.
The Importance of Cleansing Your Face
The importance of cleansing your face
Cleansing your face is an essential step in any skincare routine. It is a simple yet crucial practice that helps maintain the health and appearance of your skin. By cleansing your face daily, you can effectively remove dirt, oil, makeup, and other impurities that accumulate throughout the day. This promotes a clean and clear complexion, preventing clogged pores, acne breakouts, and other skin issues.
Cleansing your face also plays a vital role in maintaining the natural balance of your skin. The skin produces sebum, a natural oil that helps protect and moisturize the skin. However, excessive sebum production can lead to oily skin and potential skin problems. By cleansing your face, you can remove excess oil and keep your skin’s oil production in check, promoting a healthier and more balanced complexion.
In addition to removing impurities and regulating oil production, cleansing your face also prepares your skin for better absorption of other skincare products. When your skin is clean and free from dirt and oil, serums, moisturizers, and other products can penetrate more deeply into the skin, enhancing their effectiveness. This allows your skin to receive the maximum benefits from your skincare routine.
Regularly cleansing your face can also help in promoting overall skin health. One important aspect of cleansing is exfoliation, which helps remove dead skin cells and promotes cell turnover. This leads to smoother, brighter, and more youthful-looking skin. Additionally, a clean and well-cleansed face is less prone to environmental damage and can better defend against external aggressors such as pollution and bacteria.
To reap the full benefits of cleansing your face, it is important to choose a gentle yet effective cleanser suitable for your skin type. It is recommended to cleanse your face twice a day – in the morning and evening – to remove accumulated impurities and maintain the health of your skin.
Suggestions:
- Look for cleansers with ingredients like salicylic acid or benzoyl peroxide if you have acne-prone skin.
- For dry or sensitive skin, opt for gentle cleansers with hydrating ingredients like hyaluronic acid.
- Avoid harsh scrubbing or using hot water, as it can irritate the skin.
- Use a clean towel to pat your face dry after cleansing, avoiding rubbing to prevent unnecessary friction.
- Remember to cleanse your face before and after workouts to remove sweat and oil.
- Consider double cleansing if you wear heavy makeup or sunscreen to ensure thorough cleansing.
By incorporating regular cleansing into your skincare routine, you can enhance the health and appearance of your skin, keeping it clean, balanced, and glowing.
The Basics of Daily Facial Cleansing
Discover the essential steps for achieving a clean and refreshed face every morning and evening. We’ll dive into the basics of daily facial cleansing, including how to select the perfect facial cleanser, the importance of washing your hands beforehand, wetting your face to prepare for cleansing, applying the cleanser effectively, gently massaging your face for maximum benefits, thorough rinsing, and finally, patting your face dry. Get ready to unlock the secrets of achieving a rejuvenated and glowing complexion with these straightforward techniques.
1. Choosing the Right Facial Cleanser
When it comes to maintaining clean and healthy skin, choosing the right facial cleanser is crucial. Here is a comprehensive guide to help you select the perfect facial cleanser:
- Skin type: Evaluating your skin type is key in finding the most suitable cleanser. If you have oily skin, opt for foaming cleansers that can effectively control excess oil. On the other hand, individuals with dry or sensitive skin can benefit from gentle and hydrating cleansers.
- Ingredients: Pay close attention to the ingredients present in the cleanser. Look for products that contain beneficial components like salicylic acid for acne-prone skin or hyaluronic acid for optimal hydration.
- Fragrance: Sensitive skin can get easily irritated by fragrances. To avoid any potential reactions, it is advisable to choose fragrance-free or naturally scented cleansers.
- pH level: The pH level of a cleanser directly impacts the skin’s natural balance. To maintain a healthy acid mantle, opt for a cleanser with a pH level similar to the skin’s natural pH, which is around 5.5.
- Effectiveness: Assess the efficacy of the cleanser in terms of removing dirt, makeup, and impurities. Look for a cleanser that is gentle yet efficient in its cleansing abilities without stripping the skin.
- Dermatologist recommendations: It is highly valuable to consider recommendations from dermatologists or skincare professionals, as they can provide personalized insights based on your specific skin concerns.
- Price: Keep your budget in mind while selecting a facial cleanser. There are numerous options available at various price points, ensuring you can find one that fits your budget.
- Personal preferences: Lastly, consider your personal preferences such as texture (gel, cream, or foam), packaging, and brand reputation when making your decision.
By taking these factors into account, you can confidently choose the facial cleanser that is perfect for your skin type and addresses your unique skincare needs.
2. Washing Your Hands
When it comes to properly cleansing your face, one important step that should not be overlooked is washing your hands. This is a crucial step in maintaining proper hygiene and ensuring that you are not transferring any dirt, bacteria, or oils from your hands to your face.
- Wet your hands with clean water. Ensure that the water is not too hot or too cold, as extreme temperatures can be damaging to the skin.
- Apply a gentle soap or cleanser to your hands. Choose a cleanser that is suitable for your skin type and free from harsh chemicals or irritants.
- Rub your hands together to create a lather. Make sure to wash all parts of your hands, including the palms, back of the hands, fingers, and in between the fingers. This will help to effectively remove any dirt or bacteria.
- Continue to wash your hands for at least 20 seconds. This is the recommended duration for proper hand hygiene and ensures that you have thoroughly washed your hands.
- Rinse your hands with clean water. Make sure to remove all traces of the soap or cleanser from your hands.
- Dry your hands thoroughly with a clean towel or air dry them. Avoid using a dirty towel as it can reintroduce bacteria to your hands.
By following these steps, you can ensure that you are properly washing your hands before cleansing your face. This will help to maintain good hygiene and prevent any potential skin issues caused by bacteria or dirt. Remember, clean hands are essential for a clean and healthy complexion.
3. Wetting Your Face
To properly cleanse your face, it is crucial to follow a step-by-step process. Wetting your face correctly involves the following steps:
- 1. Start with clean hands: It is essential to wash your hands thoroughly before you begin to prevent any dirt or bacteria from transferring to your face.
- 2. Use lukewarm water: Avoid using water that is too hot or too cold, as extreme temperatures can be harsh on your skin. Opt for lukewarm water instead.
- 3. Wet your face: Take a small amount of water and splash it onto your face gently. Ensure that you wet your entire face, including your forehead, cheeks, nose, and chin.
- 4. Be gentle: While wetting your face, be sure to handle it with care and avoid rubbing or scrubbing your skin. These actions can lead to irritation and damage.
- 5. Pat dry: After wetting your face, use a clean towel to pat it dry gently. Avoid rubbing your skin as this can cause friction and result in irritation.
Wetting your face is a crucial step in the facial cleansing process as it helps remove surface impurities and prepares your skin for subsequent steps, such as applying a cleanser and massaging your face. By following these steps and being mindful of the water temperature and your technique, you can ensure an effective and gentle cleansing routine.
4. Applying the Cleanser
When it comes to applying the cleanser, it is important to follow the proper steps to ensure that your face is thoroughly cleansed and prepared for the next steps in your skincare routine. Here is a step-by-step guide on how to properly apply the cleanser:
- Start by ensuring that your face is clean and damp.
- Take a small amount of cleanser, approximately the size of a quarter, and apply it to your fingertips.
- Using gentle circular motions, massage the cleanser onto your face, making sure to cover all areas including your forehead, cheeks, nose, and chin.
- Pay special attention to areas where more oil or makeup may be present, such as the T-zone or around the nose.
- Avoid harsh rubbing or scrubbing as this can cause irritation to the skin.
- Continue massaging the cleanser into your skin for about 30 seconds to a minute.
- Thoroughly rinse your face with lukewarm water, ensuring that all traces of the cleanser are removed.
- Gently pat your face dry with a clean towel, avoiding any rubbing which could lead to irritation.
- Follow up your cleansing routine with the remaining steps of your skincare regimen, including toner, serum, and moisturizer.
By following these steps, you can ensure that the cleanser effectively removes dirt, oil, and impurities from your skin, leaving it clean and refreshed. Remember to choose a cleanser that is suitable for your specific skin type and concerns to achieve the best possible results.
5. Gently Massaging Your Face
When it comes to gently massaging your face, there are a few steps you can follow to ensure an effective cleansing routine:
- Start with clean hands: Before touching your face, wash your hands thoroughly to remove any dirt or bacteria.
- Apply a small amount of cleanser: Take a dime-sized amount of your chosen facial cleanser and gently massage it into your skin using your fingertips.
- Begin at the forehead: Starting at the center of your forehead, use gentle circular motions to massage the cleanser into your skin. Work your way outward towards the hairline.
- Move to the cheeks: Using the same circular motions, gently massage the cleanser onto your cheeks, focusing on any areas of congestion or dryness.
- Pay attention to the nose: The T-zone, which includes the nose, can often be more prone to oiliness. Take extra care while massaging the cleanser into this area.
- Treat the chin and jawline: Complete the cleansing process by gently massaging the cleanser onto your chin and jawline, paying attention to any areas of breakouts or blemishes.
- Rinse off thoroughly: After massaging your face, rinse off the cleanser with lukewarm water, ensuring that no residue remains on the skin.
- Pat dry with a clean towel: Instead of aggressively rubbing your face with a towel, gently pat your skin dry to minimize any irritation.
Gently massaging your face during the cleansing process helps to improve blood circulation, remove impurities, and promote a healthy-looking complexion. Remember to be gentle and avoid harsh scrubbing or tugging at the skin, as this can lead to irritation.
6. Rinse Thoroughly
When it comes to facial cleansing, the step of rinsing thoroughly is crucial for effective removal of dirt, oil, and cleanser residue from your skin. Follow these steps to ensure you rinse thoroughly:
- Start by splashing your face with lukewarm water. The temperature should be comfortable, neither too hot nor too cold.
- Using your fingertips, gently rub your face in circular motions to rinse thoroughly and loosen any remaining dirt and impurities from your skin.
- Rinse your face with water, making sure to thoroughly remove all traces of cleanser. Pay extra attention to areas like the hairline, jawline, and around the nose where dirt and oil tend to accumulate for a thorough rinse.
- Continue rinsing until the water runs clear and there are no bubbles or residue left on your skin. This ensures that you rinse thoroughly and all cleanser is completely removed.
- Dry your face by patting it gently with a clean towel. Avoid rubbing, as this can cause irritation and disrupt the natural balance of your skin.
Properly rinsing your face after cleansing is important for maintaining a clean and healthy complexion. It helps to remove any impurities that may be left behind, preventing clogged pores and breakouts. Additionally, thorough rinsing ensures that there is no residue left on your skin, allowing for better absorption of skincare products that you may apply afterwards.
Remember, always rinse your face with lukewarm water, as hot water can strip away natural oils and cold water may not effectively remove dirt and cleanser. Take your time when rinsing to ensure thorough cleansing, and follow up with a moisturizer to keep your skin hydrated and balanced.
7. Patting Your Face Dry
After cleansing your face, it is crucial to properly dry it to maintain clean and healthy skin. Follow these steps to effectively pat your face dry:
- Gently: To maintain the benefits of cleansing, use a clean, soft towel to gently pat your face. Avoid rubbing or scrubbing, as this can irritate the skin.
- Pay attention to problem areas: If you have specific concerns like acne or sensitive skin, be extra careful when patting those areas dry. Apply light pressure to avoid aggravating existing issues.
- Avoid tugging: Instead of vigorously drying your face, gently press the towel against your skin. This method helps absorb excess moisture without causing damage.
- Be thorough: Ensure that you pat your entire face dry, including the forehead, cheeks, chin, and around the nose. Pay attention to the hairline and jawline as well since these areas can also become damp.
By following these steps, you can effectively dry your face after cleansing and maintain the benefits of your skincare routine.
In addition to patting your face dry, here are a few suggestions to enhance your facial cleansing routine:
- Moisturize: After patting your face dry, apply a suitable moisturizer to lock in hydration and nourish your skin.
- Use a clean towel: Make sure to use a fresh, clean towel each time you pat your face dry to prevent transferring any bacteria or dirt.
- Avoid harsh rubbing: While patting is gentle, avoid harshly rubbing your face with a towel as it can cause irritation and inflammation.
- Follow with your skincare routine: After drying, continue with your regular skincare routine, including the application of toner, serums, and sunscreen.
How to Properly Cleanse Your Face in the Morning
Starting your day with a fresh and invigorated face is essential. In this section, we’ll uncover the morning ritual of properly cleansing your face.
Discover the secrets to choosing a gentle cleanser, the importance of splashing your face with water, and the art of applying the cleanser in circular motions.
Plus, we’ll reveal the final steps of rinsing and gently patting your skin dry. Get ready to embrace a rejuvenating and effective morning facial cleansing routine.
1. Choosing a Gentle Cleanser
When it comes to choosing a gentle cleanser for your face, it’s important to consider your skin type, specific needs, and personal preferences. Here are the steps to follow:
- Identify your skin type: Determine whether you have oily, dry, combination, or sensitive skin. This will help you choose a cleanser that addresses your specific concerns.
- Read the ingredients: Look for cleansers that are gentle and free of harsh chemicals or irritants. Ingredients like aloe vera, chamomile, and hyaluronic acid are known for their soothing and hydrating properties.
- Consider your specific needs: If you have acne-prone skin, look for a cleanser with salicylic acid or benzoyl peroxide to help combat breakouts. Those with dry skin may benefit from a cleanser that contains moisturizing ingredients like glycerin or ceramides.
- Test it out: If possible, try a sample or purchase travel-size versions of the cleanser to test it on your skin before committing to a full-size product. This will allow you to see how your skin reacts and if it feels comfortable.
- Follow the instructions: Use the cleanser according to the recommended instructions. Typically, you’ll wet your face, apply a small amount of cleanser to your hands, lather it up, and gently massage it onto your face in circular motions. Rinse thoroughly with lukewarm water.
Remember, choosing a gentle cleanser is essential for maintaining the health and balance of your skin. By following these steps, you can find a cleanser that suits your needs and leaves your skin feeling clean, refreshed, and nourished.
Fact: Did you know that using a gentle cleanser can help prevent stripping your skin of its natural oils and maintain its natural pH balance?
2. Splashing Your Face with Water
When it comes to properly cleansing your face, one important step is splashing your face with water. This step helps to remove any surface impurities and prepare your skin for the cleansing process. Follow these steps to ensure you are splashing your face with water effectively:
- Begin by wetting your hands under clean, running water.
- Once your hands are wet, cup them together to collect a sufficient amount of water.
- Gently splash the water onto your face, making sure to cover your entire face and neck.
- Continue splashing for about 20-30 seconds to ensure thorough coverage and hydration of your skin.
- Use your hands to pat the water into your skin, avoiding any harsh rubbing or tugging.
Splashing your face with water helps to awaken and refresh your skin in the morning, and at night it helps to remove any dirt, oil, and makeup that has accumulated throughout the day. It also helps to hydrate and prepare your skin for the next steps in your skincare routine.
Now that you know how to properly splash your face with water, here are some additional suggestions to enhance your facial cleansing routine:
- Use lukewarm water: Water that is too hot or too cold can be harsh on your skin. Stick to lukewarm water to avoid causing any unnecessary irritation.
- Pat, don’t rub: After splashing your face with water, always pat your skin dry with a soft towel. Rubbing your skin can cause friction and potentially lead to irritation.
- Choose the right cleanser: Select a cleanser that is suitable for your skin type and addresses your specific skincare concerns. This will ensure that you are effectively cleansing your skin without stripping away its natural moisture.
- Follow with moisturizer: After cleansing, it is important to moisturize your skin to keep it hydrated and nourished. Choose a moisturizer that works well with your skin type and apply it in gentle, upward motions.
By following these steps and suggestions, you can ensure that you are properly splashing your face with water and maintaining a healthy skincare routine. Your face will thank you for the extra care!
3. Applying the Cleanser
When it comes to properly cleansing your face, applying the cleanser is a crucial step in achieving clean and healthy skin. Follow these steps for effective application:
- Choose the right cleanser: Select a cleanser that suits your skin type and addresses your specific concerns, such as oily skin or acne.
- Wash your hands: Before touching your face or applying any products, ensure your hands are clean to prevent the transfer of bacteria or dirt.
- Wet your face: Splash your face with lukewarm water to dampen the skin and prepare it for the application of the cleanser.
- Apply the cleanser: Take a small amount of cleanser and apply it to your fingertips or a clean facial brush. Gently massage the cleanser onto your face in circular motions.
- Massage in circular motions: Use your fingertips or a facial brush to massage the cleanser into your skin using gentle, upward circular motions. Pay attention to all areas of your face, including the forehead, cheeks, nose, and chin.
- Rinse thoroughly: Rinse off the cleanser with lukewarm water, making sure to remove all traces of the product. Avoid using hot water as it can strip the skin of its natural oils.
- Pat your face dry: Gently pat your face dry with a clean towel. Avoid rubbing your skin, as it can cause irritation.
By following these steps for applying the cleanser, you can ensure that it is properly applied and thoroughly cleanses your skin, leaving it fresh and ready for the next steps in your skincare routine.
4. Massaging in Circular Motions
Massaging in circular motions is an essential step in properly cleansing your face. This technique helps to effectively remove dirt, oil, and impurities from your skin, as well as promote blood circulation and a healthy glow.
- Start with clean hands: Before you begin massaging your face, make sure your hands are clean to avoid transferring any dirt or bacteria onto your skin.
- Apply your cleanser: Take a small amount of your chosen facial cleanser and apply it to your damp face. Be sure to choose a cleanser suitable for your skin type.
- Gently massage in circular motions: Using your fingertips, start massaging your face in circular motions. Begin at the center of your face and work your way outwards, covering your entire face, including your forehead, cheeks, nose, and chin. Apply gentle pressure to avoid aggravating your skin.
- Pay attention to troubled areas: If you have areas of congestion or blemishes, spend a little extra time massaging those areas to help unclog pores and promote clearer skin.
- Rinse thoroughly: After massaging for about a minute, rinse your face thoroughly with lukewarm water. Make sure to remove all traces of cleanser from your face to prevent any residue from clogging your pores.
- Pat your face dry: Gently pat your face dry with a clean, soft towel. Avoid rubbing your skin, as this can cause irritation.
To enhance your facial cleansing routine, here are some additional suggestions:
- Consider using a facial cleansing brush to provide deeper exfoliation and promote a more thorough cleanse.
- Use a gentle, non-abrasive cleanser to avoid stripping your skin of its natural oils.
- Be mindful of your skin’s sensitivity and adjust the pressure and frequency of massaging accordingly.
- Don’t forget to include your neck in your cleansing routine, as it is often neglected but equally important for maintaining overall skin health.
- After cleansing, follow up with a suitable toner and moisturizer to replenish and hydrate your skin.
By incorporating massaging in circular motions into your daily facial cleansing routine, you can effectively remove impurities and leave your skin feeling refreshed and revitalized.
5. Rinsing and Patting Dry
When it comes to properly cleansing your face, the final step of rinsing and patting dry is crucial for maintaining healthy skin. Follow these steps to ensure you rinse and pat your face dry effectively:
1. Rinse with lukewarm water: After applying cleanser and gently massaging your face, rinse your face with lukewarm water. Lukewarm water helps to effectively remove any residue without stripping the skin of its natural oils.
2. Remove all cleanser: Make sure to rinse your face thoroughly, ensuring that all traces of cleanser are completely removed. Leaving cleanser on your skin can lead to irritation and dryness.
3. Pat your face dry with a clean towel: After rinsing, gently pat your face dry using a clean, soft towel. Avoid rubbing your skin, as this can cause irritation and disrupt the skin’s natural moisture barrier.
4. Avoid harsh rubbing: Be gentle when patting your face dry, as harsh rubbing can cause inflammation and damage to the skin. Instead, lightly press the towel against your skin, allowing it to absorb the excess moisture.
5. Leave your skin slightly damp: It’s best to leave your skin slightly damp after patting dry. This helps to lock in moisture and prepares your skin for the next steps in your skincare routine.
Remember, the way you rinse and pat your face dry can have an impact on the overall health of your skin. By following these steps, you can ensure that your skin is thoroughly cleansed and well-cared for.
How to Properly Cleanse Your Face in the Evening
Ensure a fresh and radiant complexion by mastering the art of evening face cleansing. In this section, we’ll dive into the step-by-step process to properly cleanse your face before bedtime. From removing makeup to indulging in double cleansing, we’ll explore the secrets to effectively purifying your skin. Discover the importance of using an oil-based cleanser, the rejuvenating benefits of applying a toner, and the essential final step of moisturizing for a rejuvenating skincare routine. Get ready to pamper your skin and wake up with a radiant glow!
1. Removing Makeup
Removing makeup is an important step in your facial cleansing routine. It helps to ensure that your skin is thoroughly clean and free from any residue that may clog your pores or cause skin issues. Here is a step-by-step guide on how to properly remove makeup:
- Start by using a gentle makeup remover or micellar water. Apply a small amount to a cotton pad.
- Gently press the cotton pad against your closed eyelids for a few seconds to allow the makeup to dissolve.
- Sweep the cotton pad over your eyes, moving from the inner corners to the outer corners. Be gentle to avoid tugging or pulling on the delicate skin around your eyes.
- Moving on to your face, use a fresh cotton pad or a clean section of the same pad. Apply the makeup remover to the pad and gently wipe it across your face, focusing on areas where you applied foundation, concealer, or blush.
- Pay extra attention to areas with heavy makeup, such as the lips and eyebrows.
- Continue wiping until the cotton pad comes away clean and there is no more visible makeup residue on your skin.
- After removing all the makeup, proceed with your regular facial cleansing routine to cleanse and refresh your skin.
Remember to be gentle when removing makeup to avoid irritating your skin. Always follow up with a moisturizer to keep your skin hydrated. Removing makeup is an essential step in maintaining healthy and clear skin.
Fact: A study found that women wear makeup for an average of 4.1 hours per day, highlighting the importance of effective makeup removal for maintaining healthy skin.
2. Using an Oil-Based Cleanser
Using an oil-based cleanser is an effective step in your facial cleansing routine. Here are the steps to properly use an oil-based cleanser:
- Using an Oil-Based Cleanser: Take a small amount of the oil-based cleanser onto your fingertips. Gently massage it onto dry skin, focusing on areas with makeup or sunscreen.
- Massage the face: Use your fingertips to gently massage the cleanser in circular motions all over your face. This helps to dissolve any makeup, dirt, and impurities on the skin.
- Rinse off: Wet a soft washcloth with warm water and gently wipe away the oil-based cleanser from your face. Make sure to remove all traces of the cleanser, especially around the hairline and jawline.
- Follow with a water-based cleanser: To thoroughly cleanse your skin, follow up with a water-based cleanser. This helps to remove any remaining residue and leaves your skin feeling fresh and clean.
- Moisturize: After cleansing, it’s important to moisturize your skin. Choose a moisturizer suitable for your skin type to keep it hydrated and balanced.
Using an oil-based cleanser can be beneficial for several reasons. It helps to effectively remove waterproof makeup, excess sebum, and impurities from the skin. The oil-based formula is gentle and nourishing, making it suitable for all skin types, including dry and sensitive skin. The cleanser works by attracting and dissolving oil-based substances on the skin’s surface, leaving your skin clean, refreshed, and hydrated.
History shows that oil-based cleansers have been used for centuries in various cultures for their cleansing and moisturizing properties. Ancient civilizations like the Egyptians, Greeks, and Romans used natural oils, such as olive oil and almond oil, to cleanse their skin. These oils were prized for their ability to remove dirt and makeup while keeping the skin soft and supple. Today, with advancements in skincare, oil-based cleansers have become even more refined and effective in promoting healthy and radiant skin.
3. Double Cleansing
Double cleansing is an essential step in a thorough facial cleansing routine. It involves using two different cleansers to remove all traces of dirt, oil, and makeup from your skin. Here is a breakdown of the steps involved in double cleansing:
1. Step 1: Removing Makeup
Before you start double cleansing, make sure to remove any makeup on your face using a makeup remover or micellar water. This step ensures that the cleansers can effectively cleanse your skin.
2. Step 2: Using an Oil-Based Cleanser
For the first cleanse, use an oil-based cleanser. Oil-based cleansers are effective at breaking down and removing oil-based impurities, such as excess sebum and sunscreen. Apply the cleanser to your dry face and massage in circular motions to dissolve impurities.
3. Step 3: Second Cleanser
After rinsing off the oil-based cleanser, follow up with a water-based cleanser. Water-based cleansers are designed to remove water-based impurities, such as sweat and dirt. Choose a cleanser suitable for your skin type and massage it onto your damp face using gentle circular motions.
4. Step 4: Rinse and Pat Dry
Rinse your face thoroughly with lukewarm water to remove both cleansers. Make sure to rinse off all residue to prevent any potential irritation. Pat your face dry with a clean towel, being careful not to rub your skin.
Double cleansing helps to ensure that your skin is thoroughly clean and ready for the next steps in your skincare routine. It can help to unclog pores, prevent breakouts, and allow your skincare products to penetrate more effectively.
Remember, when choosing cleansers for double cleansing, consider your skin type and any specific concerns you may have, such as acne-prone skin or sensitivity. Adapt your double cleansing routine according to your skin’s needs and preferences.
4. Applying a Toner
When it comes to your facial cleansing routine, applying a toner is crucial. This step not only helps to cleanse your skin but also restores balance. For the best results, follow these easy steps:
- Start by washing your face with a cleanser and gently patting it dry.
- Soak a cotton pad with a small amount of toner.
- Swipe the cotton pad across your face, making sure to avoid the sensitive eye area.
- Pay extra attention to areas prone to oiliness or congestion, such as the forehead, nose, and chin.
- Allow the toner to fully absorb into your skin before moving on to other skincare products.
- Finish off by applying your moisturizer and any other necessary treatments.
Applying a toner offers numerous benefits. Firstly, it effectively removes any remaining traces of impurities or cleanser, ensuring your skin is thoroughly clean and ready to absorb the advantages of your other skincare products.
Secondly, toners play a crucial role in rebalancing the pH level of your skin. By restoring its natural slightly acidic state, toners promote overall skin health.
Lastly, toners provide a valuable hydration boost. Some toners contain key ingredients like hyaluronic acid or glycerin, which attract and retain moisture in the skin, leaving it plump and thoroughly hydrated.
Let me share a true story:
A few months ago, I decided to introduce a toner into my daily skincare routine. Dealing with oily skin and occasional breakouts had always been a struggle for me, so I was curious to see if a toner could help alleviate these concerns. I opted for a toner specifically formulated for oily and acne-prone skin.
After a few weeks of consistent use, I was amazed by the significant improvement in my skin. It felt cleaner, less oily, and breakouts became less frequent. The toner effectively eliminated excess oil and impurities while rebalancing the pH level of my skin. Additionally, I loved the refreshing and hydrating sensation it provided after each use.
Applying a toner has now become an indispensable step in my skincare routine. I can confidently say that it has positively impacted the overall health and appearance of my skin.
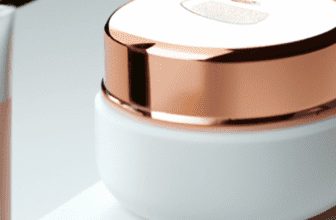
5. Moisturizing Your Skin
Moisturizing your skin is an essential step in any skincare routine. It helps to keep your skin hydrated, nourished, and protected from external factors. Follow these steps to properly moisturize your skin:
- Cleanse your face: Before moisturizing, make sure your face is clean. Use a gentle cleanser to remove any dirt, oil, or makeup from your skin.
- Choose the right moisturizer: Look for a moisturizer that is suitable for your skin type. Consider factors such as your skin’s hydration needs, any specific concerns you may have, and the climate you live in. Opt for a moisturizer with ingredients that nourish and hydrate the skin.
- Apply the moisturizer: Take a small amount of moisturizer and gently massage it onto your face and neck. Use upward motions to promote circulation and absorption. Don’t forget to apply moisturizer to your neck as well.
- Be generous with the moisturizer: Use enough moisturizer to cover your entire face and neck. Avoid using too much, as it may lead to greasiness. Adjust the amount based on your skin’s needs.
- Massage the moisturizer into your skin: Use your fingertips to gently massage the moisturizer into your skin. This helps to improve blood circulation and allows the moisturizer to penetrate deeper into the skin.
- Allow it to absorb: Give your skin some time to absorb the moisturizer. This allows the ingredients to work their magic and hydrate your skin effectively. Avoid touching or rubbing your face immediately after applying moisturizer.
- Reapply throughout the day: Depending on your skin type and the environment you are in, you may need to reapply moisturizer throughout the day. This is especially important if you have dry or dehydrated skin.
- Protect your skin: Moisturizer not only hydrates your skin but also acts as a protective barrier. It helps to lock in moisture and prevents water loss. Make sure to apply sunscreen or a product with SPF during the day to further protect your skin.
By following these steps, you can ensure that your skin stays moisturized and healthy. Remember to choose a moisturizer that suits your skin’s needs and adjust your routine based on any specific concerns you may have.
Tips for a More Effective Facial Cleansing Routine
Looking to level up your facial cleansing routine? Discover some game-changing tips that will transform your skincare game. Say goodbye to harsh scrubs and hello to a gentler approach that will leave your skin feeling refreshed. And if you want to take it up a notch, consider adding a cleansing brush to your routine. But remember, be gentle with your skin and don’t forget to pay attention to your neck area. Finally, we’ll reveal the secret to getting that flawless complexion – following up with the right skincare products. Get ready to elevate your cleansing game!
1. Avoid Harsh Scrubs
When it comes to facial cleansing, it is important to avoid harsh scrubs that can cause irritation and damage to the skin. Instead, opt for gentle exfoliation methods that provide effective cleansing without being too abrasive. Here are some alternatives to harsh scrubs:
- Chemical exfoliants: Look for products containing ingredients like alpha hydroxy acids (AHAs) or beta hydroxy acids (BHAs). These chemical exfoliants work by gently dissolving dead skin cells and unclogging pores. They can be found in toners, serums, or exfoliating pads.
- Enzyme-based exfoliators: Enzymes such as papain (derived from papaya) or bromelain (derived from pineapple) can effectively exfoliate the skin without causing irritation. These exfoliators work by breaking down the proteins that hold dead skin cells together.
- Microdermabrasion: Microdermabrasion involves physically exfoliating the skin using a device that emits fine crystals or a diamond-tipped wand. This method gently removes dead skin cells and stimulates collagen production, resulting in smoother and brighter skin.
- Soft washcloths or cleansing brushes: Opt for gentle tools like soft washcloths or cleansing brushes with soft bristles. These can help in manually exfoliating the skin while being gentle enough to avoid irritation.
- Chemical peels: For a deeper exfoliation, consider getting a professional chemical peel. This treatment uses stronger chemical solutions to remove dead skin cells and promote skin regeneration.
Remember, it is important to exfoliate the skin no more than two to three times a week to avoid over-exfoliation and irritation. Always follow up with a moisturizer and sunscreen to protect and hydrate the skin after exfoliation. By avoiding harsh scrubs and using gentle exfoliation methods, you can effectively remove dead skin cells and reveal a healthier, smoother complexion.
2. Consider Using a Cleansing Brush
When it comes to properly cleansing your face, it is important to consider using a cleansing brush as a beneficial addition to your skincare routine. Follow these steps to effectively use a cleansing brush:
- Start by selecting a suitable cleansing brush. Look for one with soft bristles that are gentle on the skin.
- Apply a small amount of facial cleanser to the brush.
- Gently wet your face with warm water to prepare for cleansing.
- Using the cleansing brush, move it in circular motions all over your face. This helps to lift dirt, oils, and impurities from the skin’s surface.
- Pay extra attention to areas prone to congestion, such as the T-zone and the sides of the nose.
- Rinse the brush with warm water after each use to keep it clean and hygienic.
- Rinse your face thoroughly with lukewarm water to remove all traces of cleanser.
- Pat your face dry with a clean towel, avoiding any harsh rubbing.
- Cleanse your cleansing brush regularly to prevent the buildup of bacteria and ensure its effectiveness.
- Remember to replace the brush head regularly as the bristles can wear out over time.
Using a cleansing brush can help to remove dead skin cells, unclog pores, and leave your skin feeling refreshed. However, it’s important to note that not everyone may benefit from using a cleansing brush. If you have sensitive or acne-prone skin, it’s best to consult with a dermatologist before considering using a cleansing brush in your routine. Additionally, be mindful of how often you use the cleansing brush as overuse can potentially cause irritation.
3. Be Gentle with Your Skin
When it comes to taking care of your skin, it’s essential to remember to be gentle with your skin. Being gentle with your skin not only promotes a healthy and radiant complexion but also helps prevent damage. Here are some tips to help you be gentle with your skin:
- Cleanse with care: When cleansing your face, use a gentle facial cleanser that is suitable for your skin type. Avoid harsh cleansers that can strip away natural oils and irritate the skin.
- Use soft, circular motions: When applying cleanser or any skincare product, use soft, circular motions to massage it into your skin. This helps to gently exfoliate and improve blood circulation without causing any irritation.
- Pat dry instead of rubbing: After cleansing or washing your face, pat your skin dry with a clean, soft towel instead of rubbing it. Rubbing can cause friction and lead to irritation or redness.
- Avoid over-exfoliating: Exfoliating can be beneficial for removing dead skin cells, but over-exfoliating can damage the skin’s protective barrier. Limit exfoliation to once or twice a week and choose gentle exfoliators.
- Be mindful of pressure: Whether you’re applying skincare products or using tools like facial brushes, apply gentle pressure. Applying too much pressure can cause irritation and even lead to broken capillaries.
- Protect your skin from the sun: Sun exposure can damage the skin and cause premature aging. Wear sunscreen with a high SPF every day, even on cloudy days, and seek shade when the sun is at its strongest.
- Choose non-irritating ingredients: When selecting skincare products, opt for those that are free from harsh chemicals and known irritants. Look for ingredients like aloe vera, chamomile, and hyaluronic acid, which are gentle and soothing for the skin.
By following these tips and being gentle with your skin, you can maintain its health and radiance for years to come.
4. Don’t Forget to Cleanse Your Neck
When it comes to facial cleansing, many people focus solely on their face and neglect an important area – the neck. Cleansing your neck is just as important as cleansing your face, as it helps to remove dirt, oil, and impurities, which can lead to clogged pores and breakouts. Here are the steps to properly cleanse your neck:
- Wet your neck: Before applying any cleanser, wet your neck with lukewarm water. This helps to open up the pores and prepare the skin for cleansing.
- Apply cleanser: Choose a gentle cleanser that is suitable for your skin type. Apply a small amount of cleanser to your fingertips and gently massage it onto your neck using upward motions.
- Massage: Using gentle circular motions, massage the cleanser into your neck for about 30 seconds. This helps to remove dirt, oil, and dead skin cells, promoting a clean and healthy neck.
- Rinse: Rinse off the cleanser thoroughly with lukewarm water. Ensure that all traces of cleanser are removed from your neck.
- Dry: Gently pat your neck dry with a clean towel. Avoid rubbing or harshly drying your neck, as this can cause irritation.
By following these steps, you can ensure that your neck is properly cleansed and ready for the next steps in your skincare routine. Don’t Forget to Cleanse Your Neck every time you cleanse your face, both in the morning and in the evening. Your neck deserves the same care and attention as your face to keep your skin healthy and glowing.
5. Follow with the Right Skincare Products
After properly cleansing your face in the morning and evening, it is crucial to follow with the right skincare products to further enhance the health and appearance of your skin.
- 1. Moisturizer: After cleansing, it is essential to apply a moisturizer suitable for your skin type. This helps to lock in hydration and keep your skin nourished throughout the day or night.
- 2. Sunscreen: Protecting your skin from harmful UV rays is essential, even on cloudy days. Apply a broad-spectrum sunscreen with an SPF of at least 30 to shield your skin from sun damage and prevent premature aging.
- 3. Serum or Treatment: Depending on your skincare concerns, you may want to incorporate a targeted serum or treatment. For example, if you have dark spots or hyperpigmentation, a brightening serum with ingredients like vitamin C can help even out your skin tone.
- 4. Eye Cream: The delicate skin around the eyes requires special attention. Use an eye cream to moisturize, reduce puffiness, and diminish the appearance of fine lines and wrinkles.
- 5. Lip Balm: Don’t forget to care for your lips! Apply a nourishing lip balm to keep your lips hydrated and prevent dryness or chapping.
Remember, when selecting skincare products, consider your skin type, concerns, and any specific ingredients that work well for you. Additionally, patch test new products before applying them all over your face to ensure compatibility and avoid any potential allergic reactions.
Some Facts About How to Properly Cleanse Your Face in the Morning and Evening:
- ✅ Washing your face twice daily is recommended by dermatologists to remove makeup, dirt, and grime. (Source: healthline.com)
- ✅ Before cleansing, use a gentle makeup remover to ensure that pores are not clogged. (Source: healthline.com)
- ✅ The double cleansing method, using natural oil followed by a mild face wash, can effectively remove dirt and makeup. (Source: healthline.com)
- ✅ Avoid using bar soaps as they can alter the pH balance of the skin and lead to bacteria and yeast growth. (Source: healthline.com)
- ✅ Water temperature extremes can cause irritation, so it’s best to use lukewarm water when washing your face. (Source: healthline.com)
Frequently Asked Questions
Question: How often should I wash my face in the morning and at night?
Answer: Dermatologists recommend washing your face twice a day, once in the morning and once at night. This helps remove dirt, makeup, and grime from the day and prepares your skin for skincare products. It is especially important to wash your face in the morning if you work out to prevent clogged pores and breakouts.
Question: What kind of cleanser should I use for morning and nighttime cleansing?
Answer: For morning and nighttime cleansing, it is recommended to use a gentle, non-abrasive cleanser without alcohol. You can choose from a variety of options such as creams, balms, or micellar water. Cleansing oils or balms are particularly beneficial for dry skin or during harsh seasons, while micellar water is suitable for removing sebum buildup in oily skin. Ultimately, the best cleanser for you will depend on your individual skin type and needs.
Question: Can I use exfoliating cleansers for morning and nighttime cleansing?
Answer: While exfoliating cleansers can be beneficial, it is generally advisable to avoid using them on a daily basis. Exfoliating cleansers that contain ingredients like salicylic acid, glycolic acid, or fruit enzymes can help clear pores and remove dead skin cells, but they may be too harsh for everyday use. It’s best to reserve their use for 1-2 times a week to prevent over-exfoliation and maintain the skin’s protective barrier.
Question: Are washcloths or sponges recommended for cleansing the face in the morning and at night?
Answer: Dermatologists recommend avoiding the use of washcloths or sponges when cleansing the face, as they can potentially irritate the skin. Instead, it is best to use your fingertips or hands to apply the cleanser and gently massage the face in a circular motion. This helps minimize irritation and maintains the skin’s natural balance.
Question: Can I use bar soaps for morning and nighttime cleansing?
Answer: It is generally advised to avoid using bar soaps for cleansing the face, as they can alter the pH balance of the skin and lead to bacteria and yeast growth. Opt for a gentle, non-abrasive cleanser specifically formulated for facial use. These cleansers are designed to effectively remove dirt, debris, and oil without stripping the skin of its natural moisture.
Question: Should I rinse my face with lukewarm water or cold water for morning and nighttime cleansing?
Answer: When washing your face in the morning and at night, it is best to use lukewarm water. Water temperature extremes, such as very hot or cold water, can cause irritation and disrupt the skin’s natural balance. Lukewarm water helps to effectively cleanse the face without causing unnecessary irritation or dryness.